
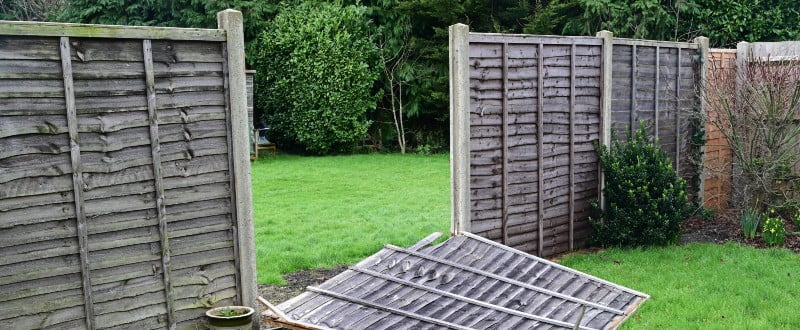
 The integrity and appearance of your property, a sturdy and well-maintained fence plays a vital role. However, fences wear and tear, resulting in damaged or deteriorating fence panels. If you’re facing this issue, it’s important to safely remove and replace damaged fence panels for and aesthetic appeal of your property. Begin by examining the extent of the damage to your fence panels. Look for signs of rot, cracks, or loose components. Assess whether the damage can be repaired or if it requires a complete replacement. If the damage is extensive or compromises the structural integrity of the fence, replacement is often the best option.
Gather the necessary tools and materials
Before you start the removal and replacement process, you have all the required tools and materials handy. These may include a pry bar, hammer, screwdriver, replacement fence panels, nails, screws, and a saw. To remove the damaged fence panels, begin by removing any screws or nails that are securing them to the posts. Use a pry bar or hammer too carefully from the posts. Work systematically, starting from the top and gradually moving down. Take caution with any adjacent panels or surrounding structures during the removal process. The damaged panels have been removed, measure the dimensions of the gaps left behind. Use these measurements to cut the replacement panels accordingly. Ensure a proper fit by trimming the panels to the correct size using a saw. Sand the edges of the panels to remove any roughness or splinters. Info about weldmesh fencing commercial and industrial settings, as it is very durable and can withstand a lot of wear and tear.
Install the replacement panels
With the replacement panel’s ready, position them in the vacant spots left by the damaged panels. Secure them to the fence posts using nails or screws, depending on the type of fencing material. Ensure that the panels are level and aligned correctly with the adjacent panels. Use a level tool to double-check the alignment. To ensure the longevity and stability of the new panels, reinforce them by attaching additional support. This can be done by attaching braces or crossbeams to the panels and posts, providing extra strength against external forces such as strong winds or accidental impacts.
Reinforcing solar panels with additional support is indeed a good practice to enhance their longevity and stability. Attaching braces or crossbeams to posts can provide extra strength to withstand external forces. Here are some steps you can follow to reinforce the panels. Before proceeding with reinforcement, evaluate the existing installation to identify any weak points or areas of support. Look for any signs of stress or movement in the panels. Once the replacement panels are securely in place, inspect the entire fence for any loose components or signs of damage. Tighten any loose screws or nails and apply a protective coating or paint to enhance the durability and appearance of the fence. Regularly inspect and maintain your fence to prevent future damage and address any issues promptly.